GS Toolbox
INTRO
GS Toolbox is primarily a hard surface modeling plug-in but it can also be used in other workflows as well.
This tutorial covers only the basics of this plugin, however, it is more than enough to start using it correctly and discover other features on your own. For more in-depth information, refer to the User Manual.
My name is George Sladkovsky and here is a quick tutorial covering some of the main features of GS Toolbox plug-in for Maya:
USER INTERFACE
GS Toolbox UI consists of three Shelf Buttons and a dockable menu that holds all the functional buttons as well as Options, Help and About menus.

TB UI - will open and close the main menu
TB Reset - will reset the menu to its default state
TB Del - will delete the menu and stop all the background activities

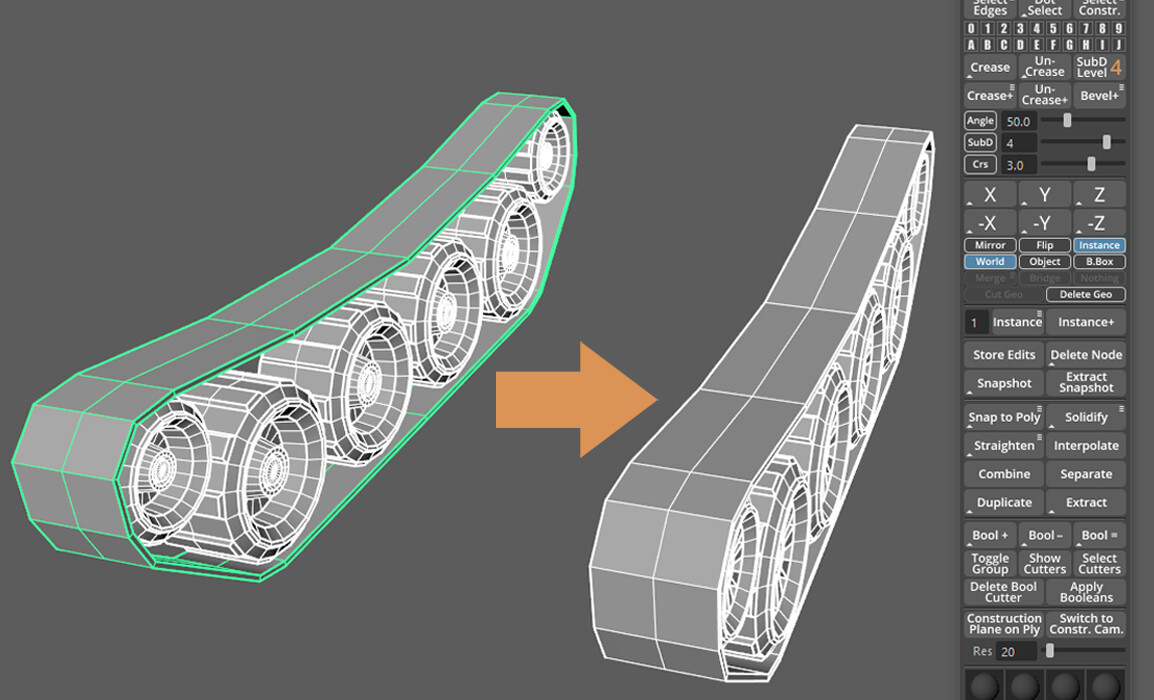
SELECTION, CREASING AND BEVELING

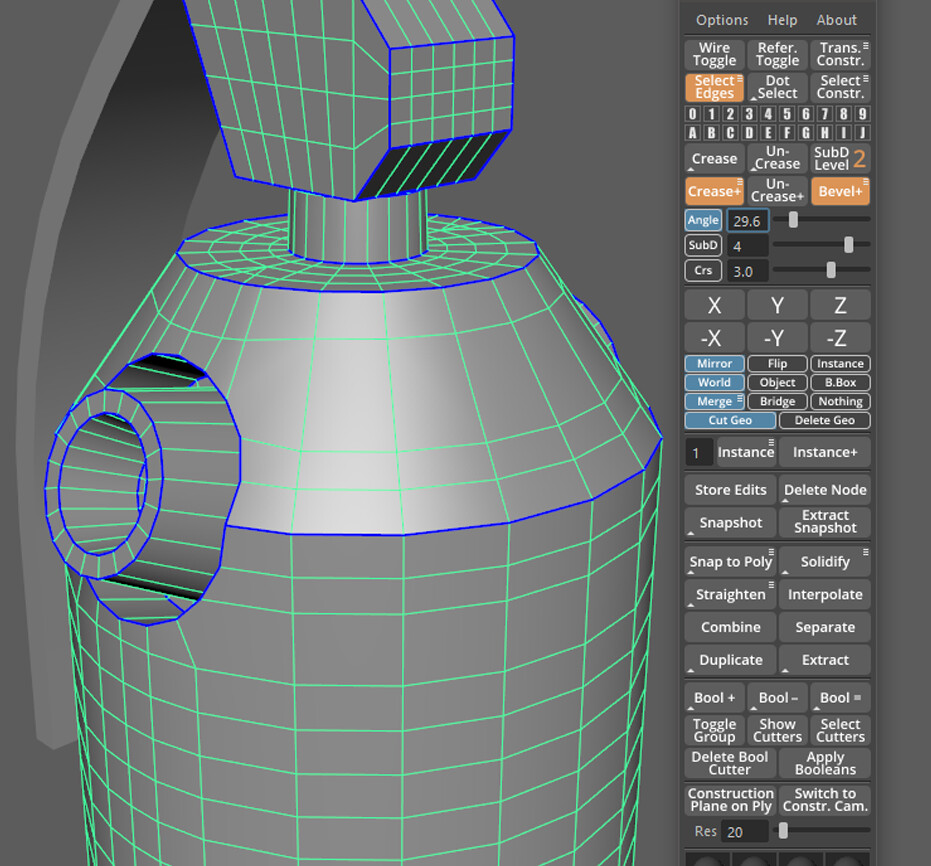
GS Toolbox makes selecting edges an easy task. Using interactive slider or just typing in the angle value and clicking one button.
- Select your mesh (or faces)
- Click on "Angle" button for interactive preview of the selected edges (optional)
- Confirm selection using "Select Edges" button. Works on multiple meshes as well
Creasing by Angle:
- Select your mesh (or faces)
- Click on "Angle" button to enable interactive preview (optional)
- Confirm the crease using "Crease+" button. You can select crease level and subdivision level using provided SubD and Crs sliders
Select Edges, Crease+ and Bevel+ buttons are context sensitive, which means that they will react on different selections differently. If you select Object they will look on all the edges in that object. If you select part of the object (using face selection) it will only look for edges in this selected part.
You can also change any creased edges by creating crease sets right from the menu:
- Hold RMB on "Crease+" button to access the marking menu.
- Move your mouse to "Create Crease Sets from Mesh" button and release.
- After you edited your creases, apply the edits by repeating the procedure but selecting the "Bake Crease Sets to Mesh" button.
Beveling workflow expands on all the previous workflows by adding the ability to convert creases to bevels and bevel by angle feature. To convert creases to bevels:
- Hold RMB on "Crease+" button to access the marking menu.
- Move your mouse to "Convert Creases to Bevels" button and release.
Bevel by angle works similar to Crease by Angle.
When you activate Interactive selection (Angle button, near the Angle Slider) you can notice that some of the buttons have changed colors from default to orange. This indicates that you can finish interactive selection using one of those buttons.
QUICK GROUPS
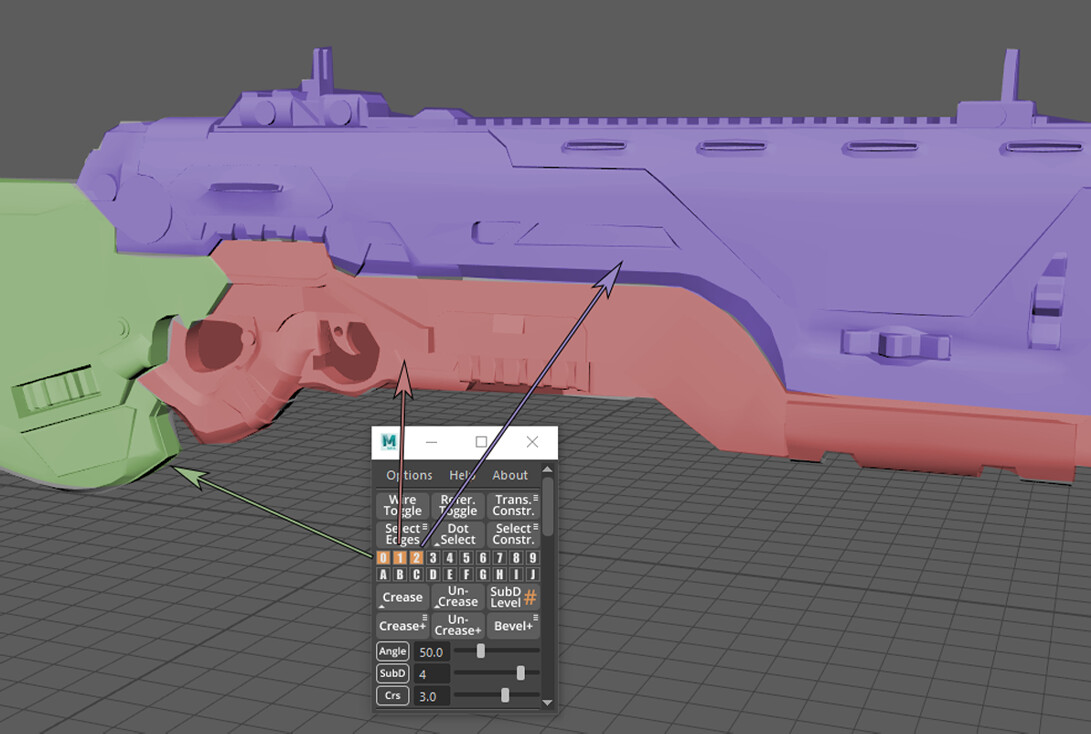
Sometimes it is necessary to quickly save selected components or objects to then return to this selection.
Quick Groups allow you to quickly add any selection to a special set that can be accessed later.

Select part of your model or entire objects and then click with LMB on any of the 20 quick groups to save the selection. The group will change color from default grey to orange. Subsequent clicks on that group will select any stored components and objects.
Here are some group commands you can use:
- Select Objects or Components
- LMB on empty group will add selection to this group. LMB on orange (active) group will select any stored components and objects.
- Shift + LMB on multiple orange groups will additively select their contents.
- Ctrl + LMB will quickly hide any grouped components or objects (group will turn light grey to indicate hidden components).
-
Hold RMB to access marking menu:
- Merge to this group - exclusively add selection to this group. If it was in any other group before, it will remove it from those group.
- Toggle Group Visibility acts as Ctrl + LMB option
- Toggle Group Reference - disables viewport selectability of a group.
- Add/Remove Selection From Group - will add or remove selected objects/components from selected group
- Clear Group will empty the group but will not delete any geometry.
MIRRORING, INSTANCING, FLIP AND DELETE BY SYMMETRY
The ability to quickly mirror and instance objects is very important in Maya because of its lack of global modifiers.
In GS Toolbox mirroring, instancing, flipping and cutting geometry is done in the Mirror Menu.
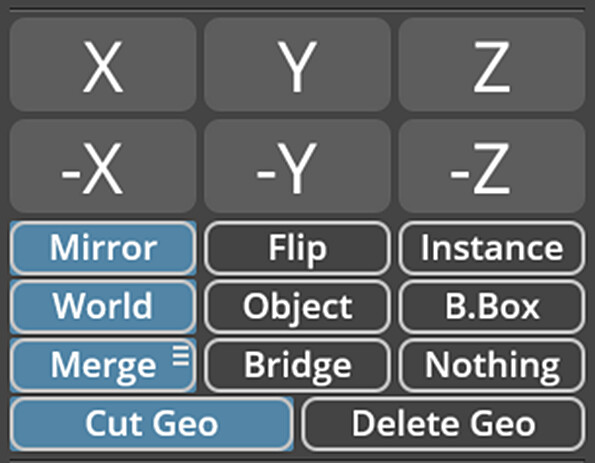
In this menu you have all the mirroring, instancing and cutting features available with advanced matrix transformations for Flip and Instance and more.
- XYZ and -XYZ buttons control the direction of mirror.
-
Radio Buttons (selectors) below XYZ buttons control the combination of settings for mirror.
- For example: To Instance something, simply select "Instance" button and click XYZ or -XYZ
Multiple selected objects are supported for every mirror feature.
BOOLEANS
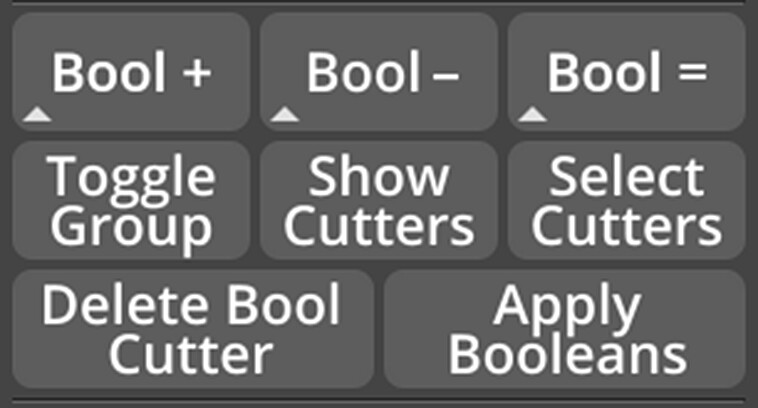
- Select Base Object and then any Cutters you want.
- Bool +, Bool - and Bool = will run the Union, Difference or Intersection Boolean command
- Booleans are grouped in one group for every object. Every subsequent cutters will go into the same group
- You can Edit Cutter Objects after you Boolean. Just treat it as normal geometry
- Hide/show and select cutters using Buttons "Toggle Group, Show Cutters, Select Cutters"
- Delete, bypass and change operation of any Boolean cutter using "Delete Bool Cutter" button and options in the Channel Box
- Apply Booleans using "Apply Booleans" button

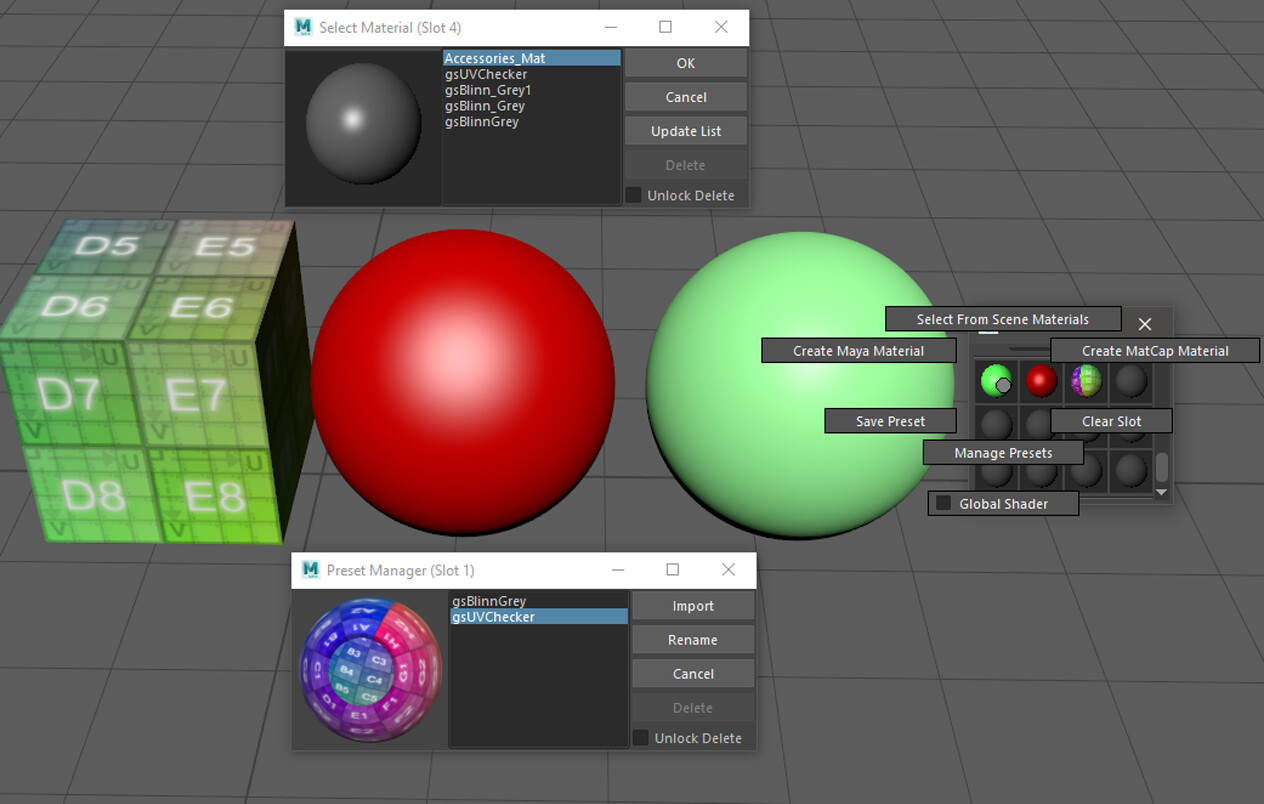
QUICK MATERIALS

GS Toolbox has a simple yet powerful material management menu. Using 12 material slots, that can quickly apply materials, select meshes with this material, save/load scene independent presets, create MatCaps (Material Capture shaders) using any user image and selecting a global shader (applied to any newly created meshes).
- To access marking menu, Hold RMB on any of the 12 material slots:
- Add From Scene Materials will open a window where you can add any existing materials to quick slots.
- Create MatCap Material will create MatCap materials (material capture) from any user image and put it in selected slot
- Save Preset allows you to save any material (and its shading network) from quick materials to preset manager (scene independent)
- Manage Presets will open a material management window where all your presets can be found (scene independent)
MISCELLANEOUS MODELING FUNCTIONS
There are even more features to discover in GS Toolbox. Here is just a small part of additional functions:
-
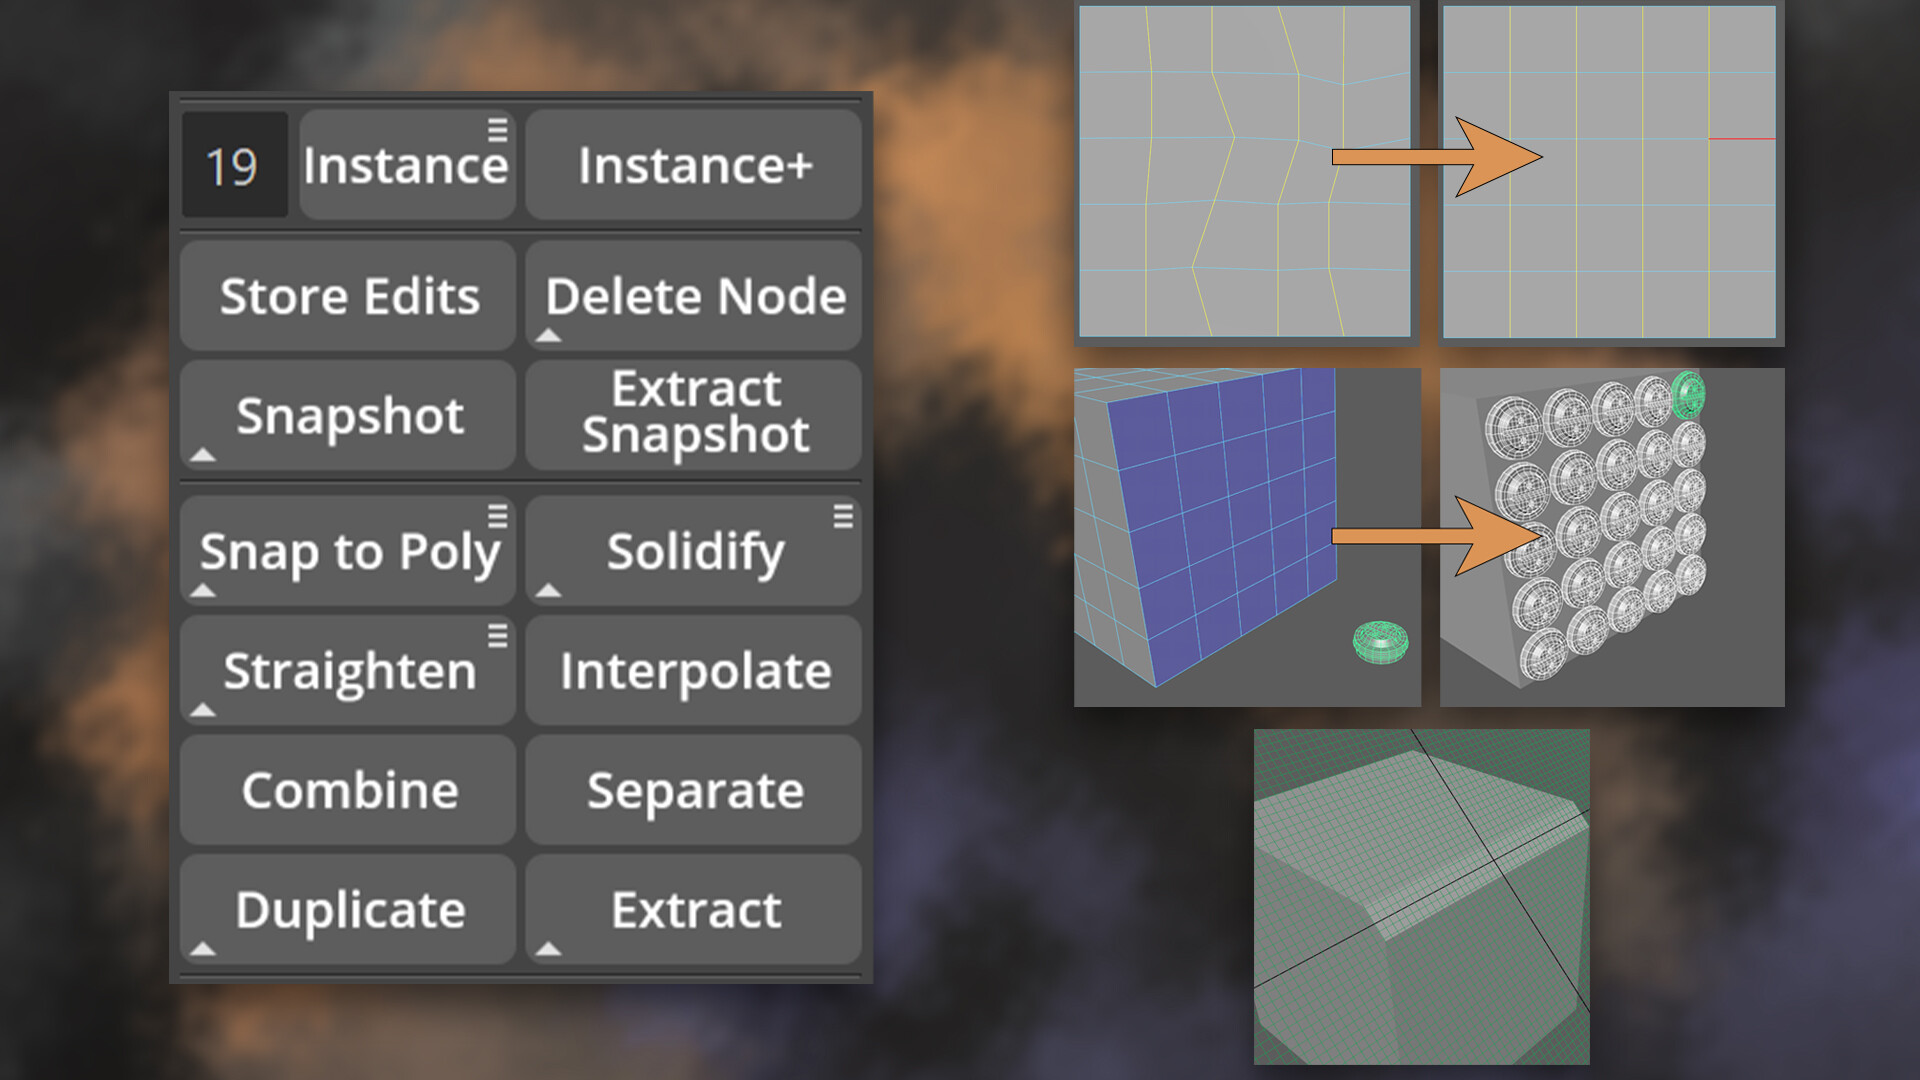
Straighten will straighten selected edge groups (unconnected edges) from first to last vertex
- Shift + Straighten will also equalize the lengths of selected edges
- Interpolate will smoothly interpolate selected edge groups (unconnected edges) using first, middle and last vertex as guides
-
Snap to Poly will snap any selected objects to any selected faces
- In marking menu you can select between simple snap and snap with instance. This function will match the number of selected faces with number of automatically created instances and snap the (see screenshot)
- Combine, Separate, Duplicate and Extract act similar to regular Maya functions but they will not create any unnecessary groups in the outliner. History is preserved.
-
Snapshot - create a fast duplicate of the selected object, hides it and moves it in a special group.
- Shift + Snapshot will also delete history on the original object after snapshot was created.
-
Delete Node - will delete any selected node in the Channel Box (or Attribute Editor).
- Shift + Delete Node will delete the Latest node in the history stack of the selected object.
- Store Edits - will store any unsaved vertex transformations on the object (see documentation for more advanced explanation)
- Instance+ - will create a special instance that is compatible with Booleans and can use nodes as modifiers.